
IBM X-series - How to update the firmware
This document explains how to update the firmware of an IBM X-series server
In this case the X-series server was an x3650 (7979), however the method will be the same for other models of X-series servers
The key step to this procedure is aquiring the UpdateXpress Systems Packs Installer
You can download the utility here. Download setup201.exe
At the time of writing (July 2008) the installer file name for windows is version 2.01 and is named setup201.exe. The windows version of this installer file is required if are planning to download the firmware updates from the IBM website onto a windows PC and does not mean the firmware updates will only be for an X-series server running windows. The windows installer file still allows you to download updates for X-series servers running another OS such as Linux.
Create an empty folder called firmware and copy the setup201.exe file into this directory.
Double click on the the file setup201.exe
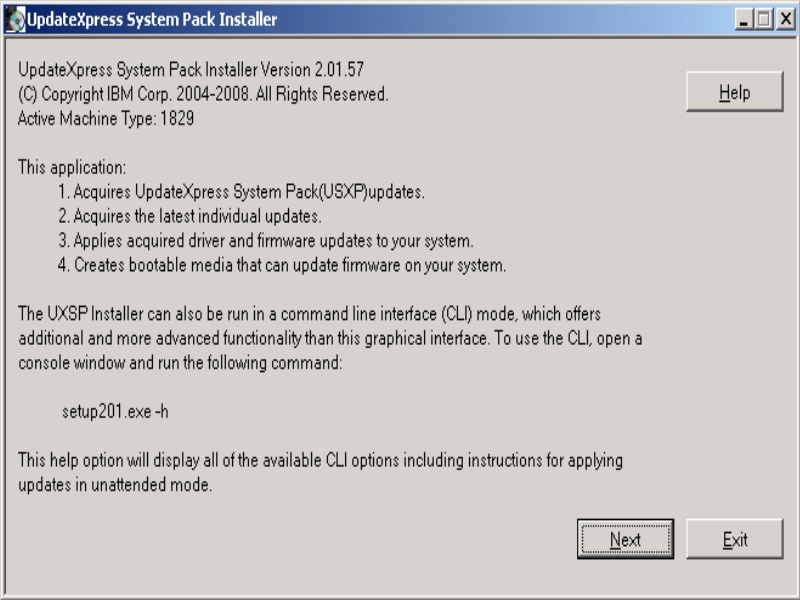
A window should open similar to the following
Read the contents of the window and then click "Next"
Select "Acquire Updates" and then click "Next"

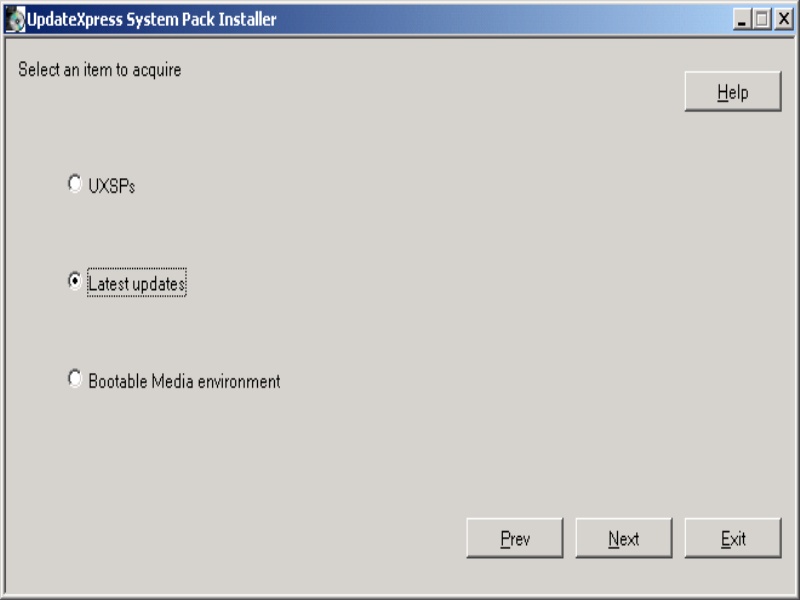
Select "UXSPs" and then click "Next"

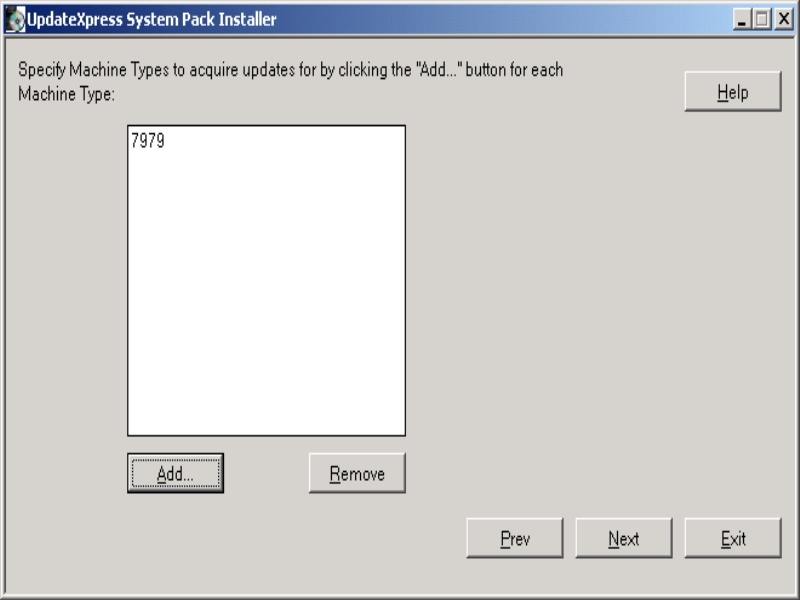
Click "Add" and add the model number of your X-series server. In this case we added Model 7979. Then click "Next".
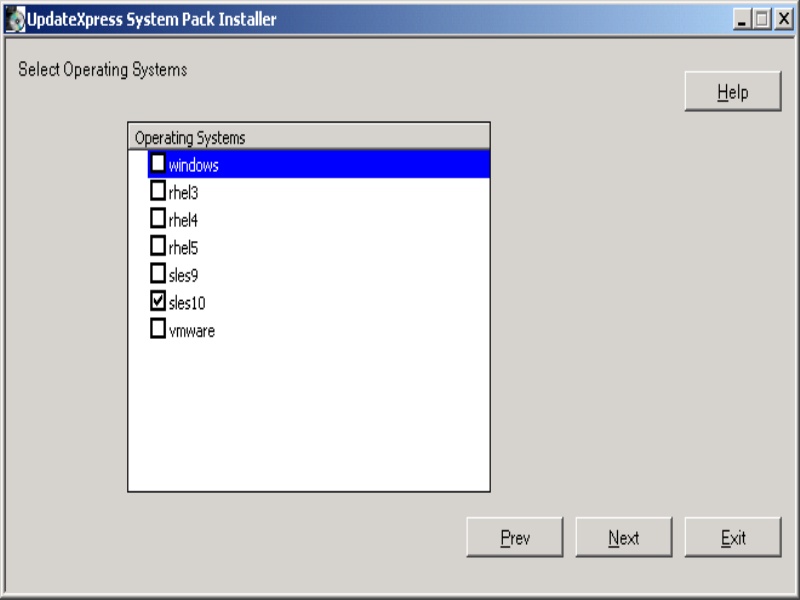
Select "sles10". We used the sles10 firmware updates even though we were installing VMWare ESX server on the X-series servers, and the updates were successfully applied. However if you plan to install another OS on the X-series servers then choose an OS that is applicable to your environment. Then click "Next".
Go back to the beginning of the utility and select "Aquire Updates" again, but this time on the next page select "Latest updates" and continue in the same way as described above.
Go back to the beginning of the utility and select "Aquire Updates" again, but this time on the next page select "Bootable Media environment" and continue in the same way as described above.

Ok you should now have all the required updates. The last step is to create a bootable USB key with all the updates on.
To do this you will need a spare empty USB key. Plug this into the USB socket on your computer.
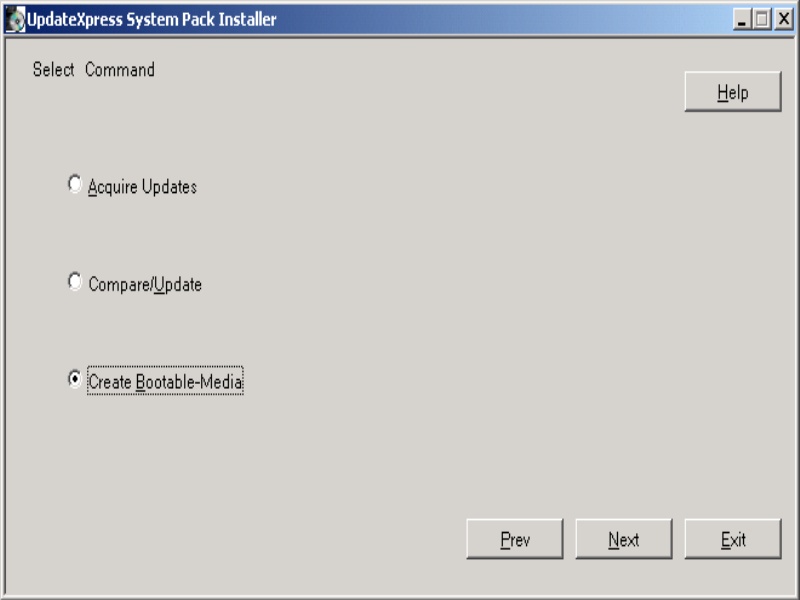
Then again from the beginning of the setup201.exe utility, select "Create Bootable-Media" and click "Next"
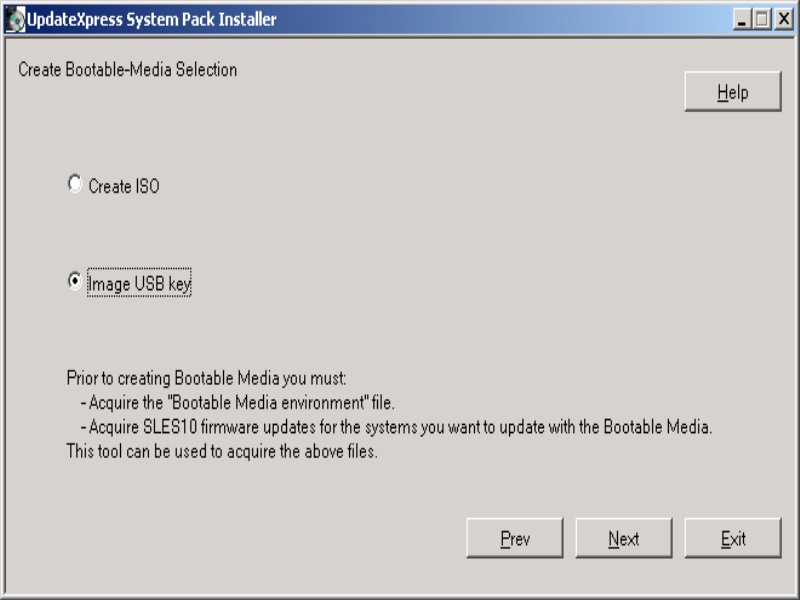
Click on "Image USB key" and then click "Next"
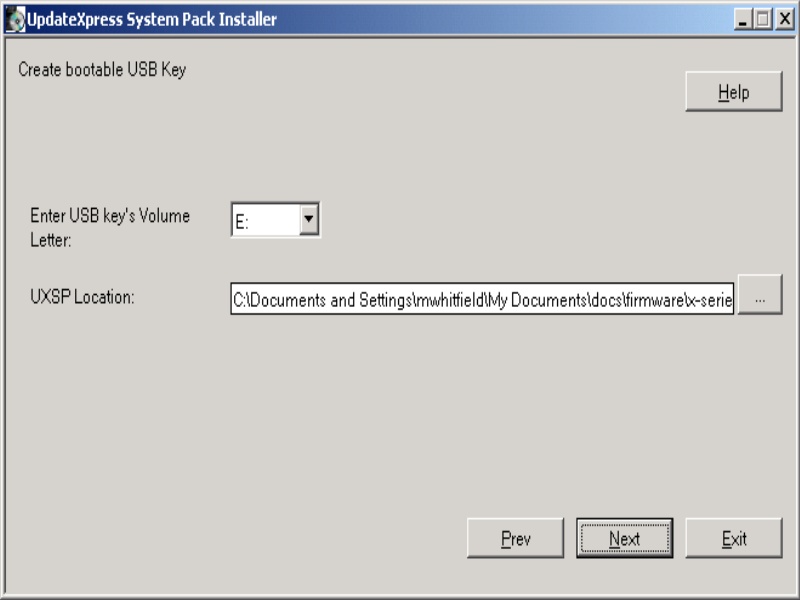
Finally select the USB key volume letter and ensure the UXSP location is correct. This is the firmware directory we downloaded the updates to. Then click "Next" and the USB key should be formatted and made bootable and all the updates copied to it.
We now need to update the X-series server with the updates from the USB key
To do this plug the USB key into the USB socket and then power up the server.
At the prompt "Press F12 to select boot device", press the F12 key
Wait for the screen that displays all the possible boot devices and choose the USB key from the list
The server will then boot from the USB key and display a list of the devices on the server that can be updated. Choose the automatically selected devices unless you have specific requirements.
If you do need to manually change then select or deselect the devices as required.